Finally, after weeks of careful UX design, iterative development and testing, it is here …
Our new (version 05) release introduces progress tracking (checklists) to Method Grid!
This fundamental upgrade means that Method Grid is more than just the home for your company’s operating playbook; now, it is also a solution for tracking and managing workflow progress through your best-practice grids.
How did this come about?
From the moment we saw many of you cloning master grids into actual instances of a grid’s delivery and then manually labelling elements to track workflow through a grid – we realised that Method Grid was far more than just a central home for repeatable, best-practice reference.
It was also your solution for best-practice workflow management and tracking!
As such, and in conversation with many of you (a huge thanks to all who took the time), this logically led to the request for checklists within grid elements.
We are excited to say this is all now live and – we feel – takes the Method Grid solution to a whole new level.
We hope you agree!
What is the main use/benefit of checklists?
Now, with grids that capture workflow tasks (e.g. project delivery, staff induction, client on-boarding etc.) you can clone your (forever-improving) master grids into specific instances in order to logically tick-your-way through an easy-to-follow workflow schematic.
Elements were always able to capture a rich array of information/guidance/tools to help you undertake a certain methodological step; now they can also help you work-manage and progress-track.
The ability to configure simple element-checklist-complete formatting rules – for example, to turn an element green when all of the contained checklist items are complete – introduces a simple, yet powerful, graphical overlay of progress at the grid (overall methodology/procedure) level.
How does it all work?
To find out more about this major new release, the following video talks through all the key new features – else you can read on below.
What new (checklist) features have we introduced?
This blog describes all the related features that go with this new release, including:
(1) Adding a new checklist area to an element
(2) Adding a new checklist item to a checklist area
(3) Moving/deleting checklist items
(4) Configuring a checklist-complete element display rule
(5) Cloning master grids and user completion of checklist items
(6) Tracking progress – at the element level, the grid level and the summary folder level
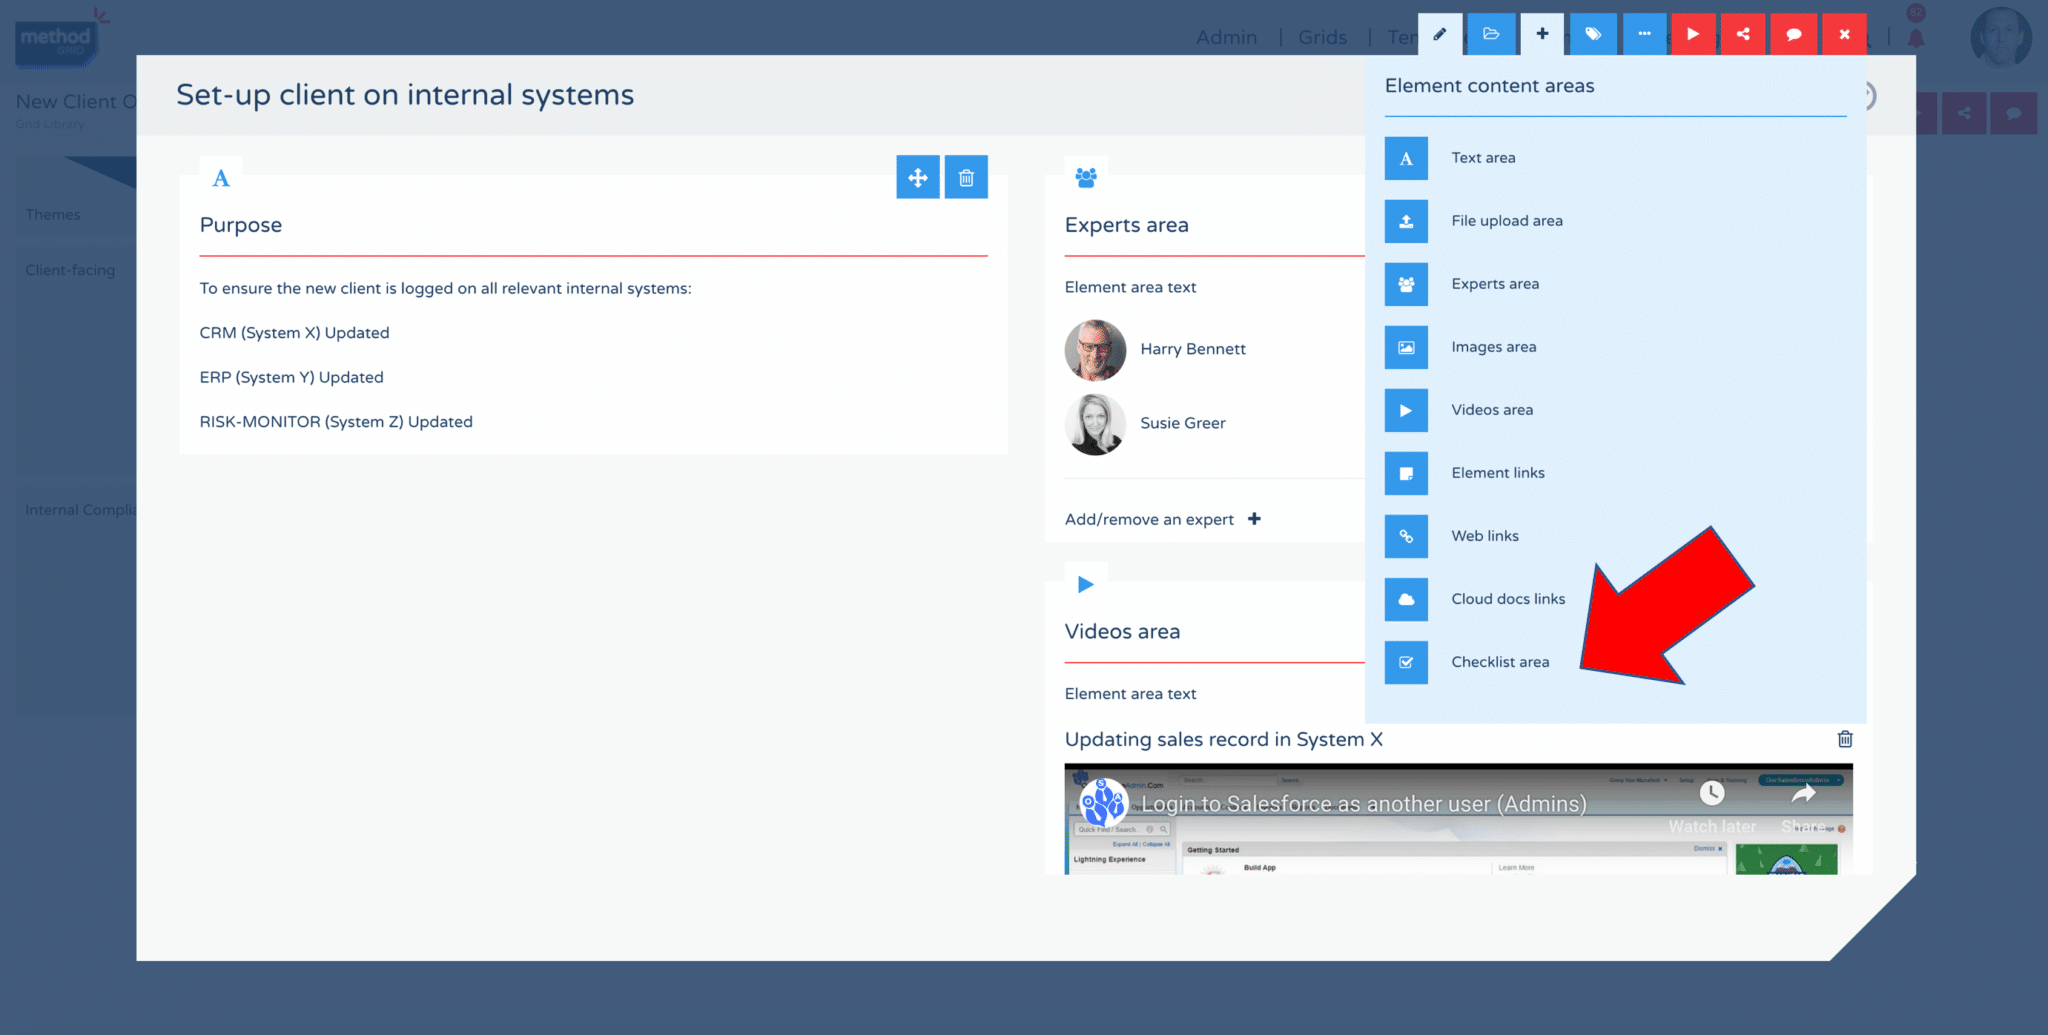
(1) Adding a new checklist area to an element
Now, within the element builder, architects and builders can add a checklist area (or multiple checklist areas) to an element – by clicking on the “add element content areas” action button (“+”) in the element builder action button panel and selecting “Checklist area”. Like all other content areas, they can then be placed (using the blue drag-drop action button) in any position.
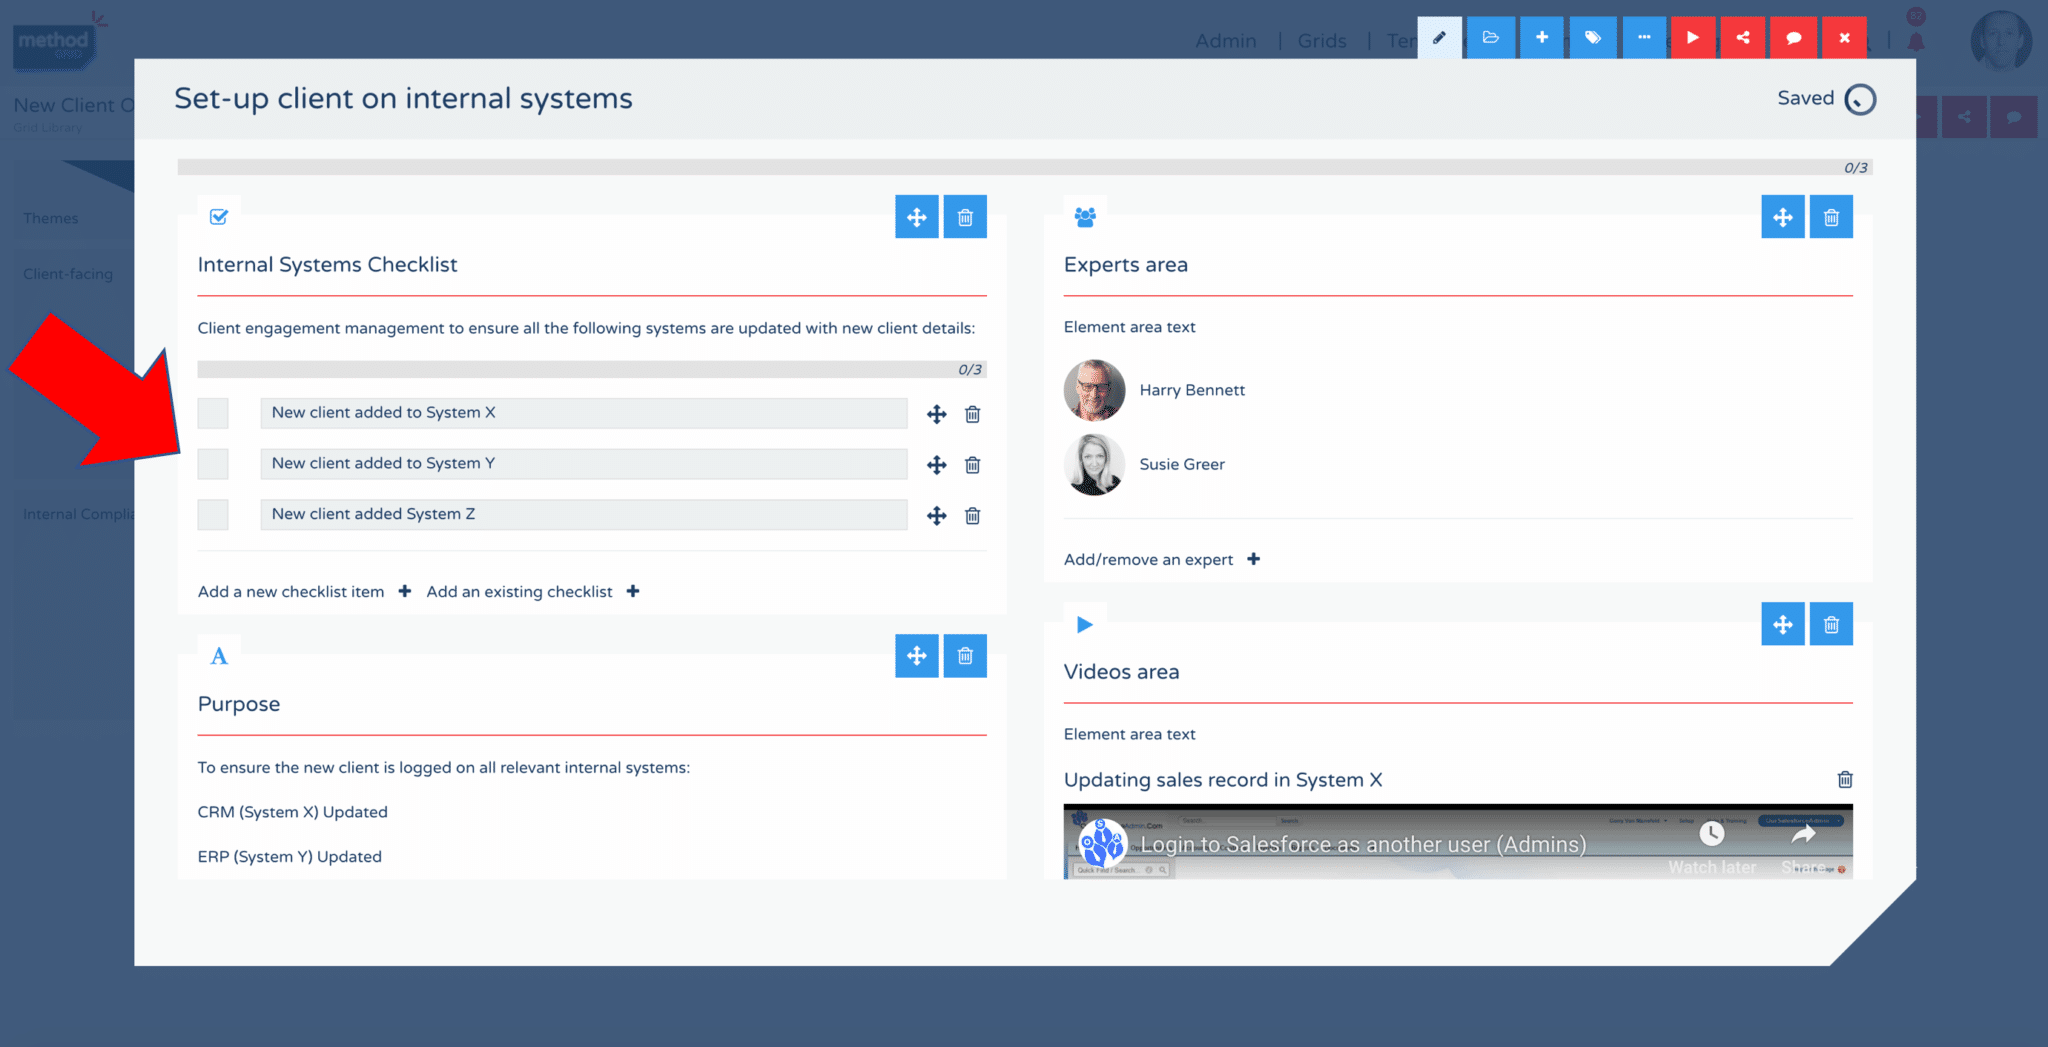
(2) Adding a new checklist item to a checklist area
Within a checklist area, an architect or builder can add checklist items by clicking “Add a new checklist item +” and typing in the new task description.
You might just want to add a simple, single “Element completed” checklist item or, as in the example below, a series of related steps.
It is also possible to import a previously developed checklist from another element by clicking on “Add an existing checklist +” and selecting from the dropdown list (presented by grid name | element name | checklist area name).
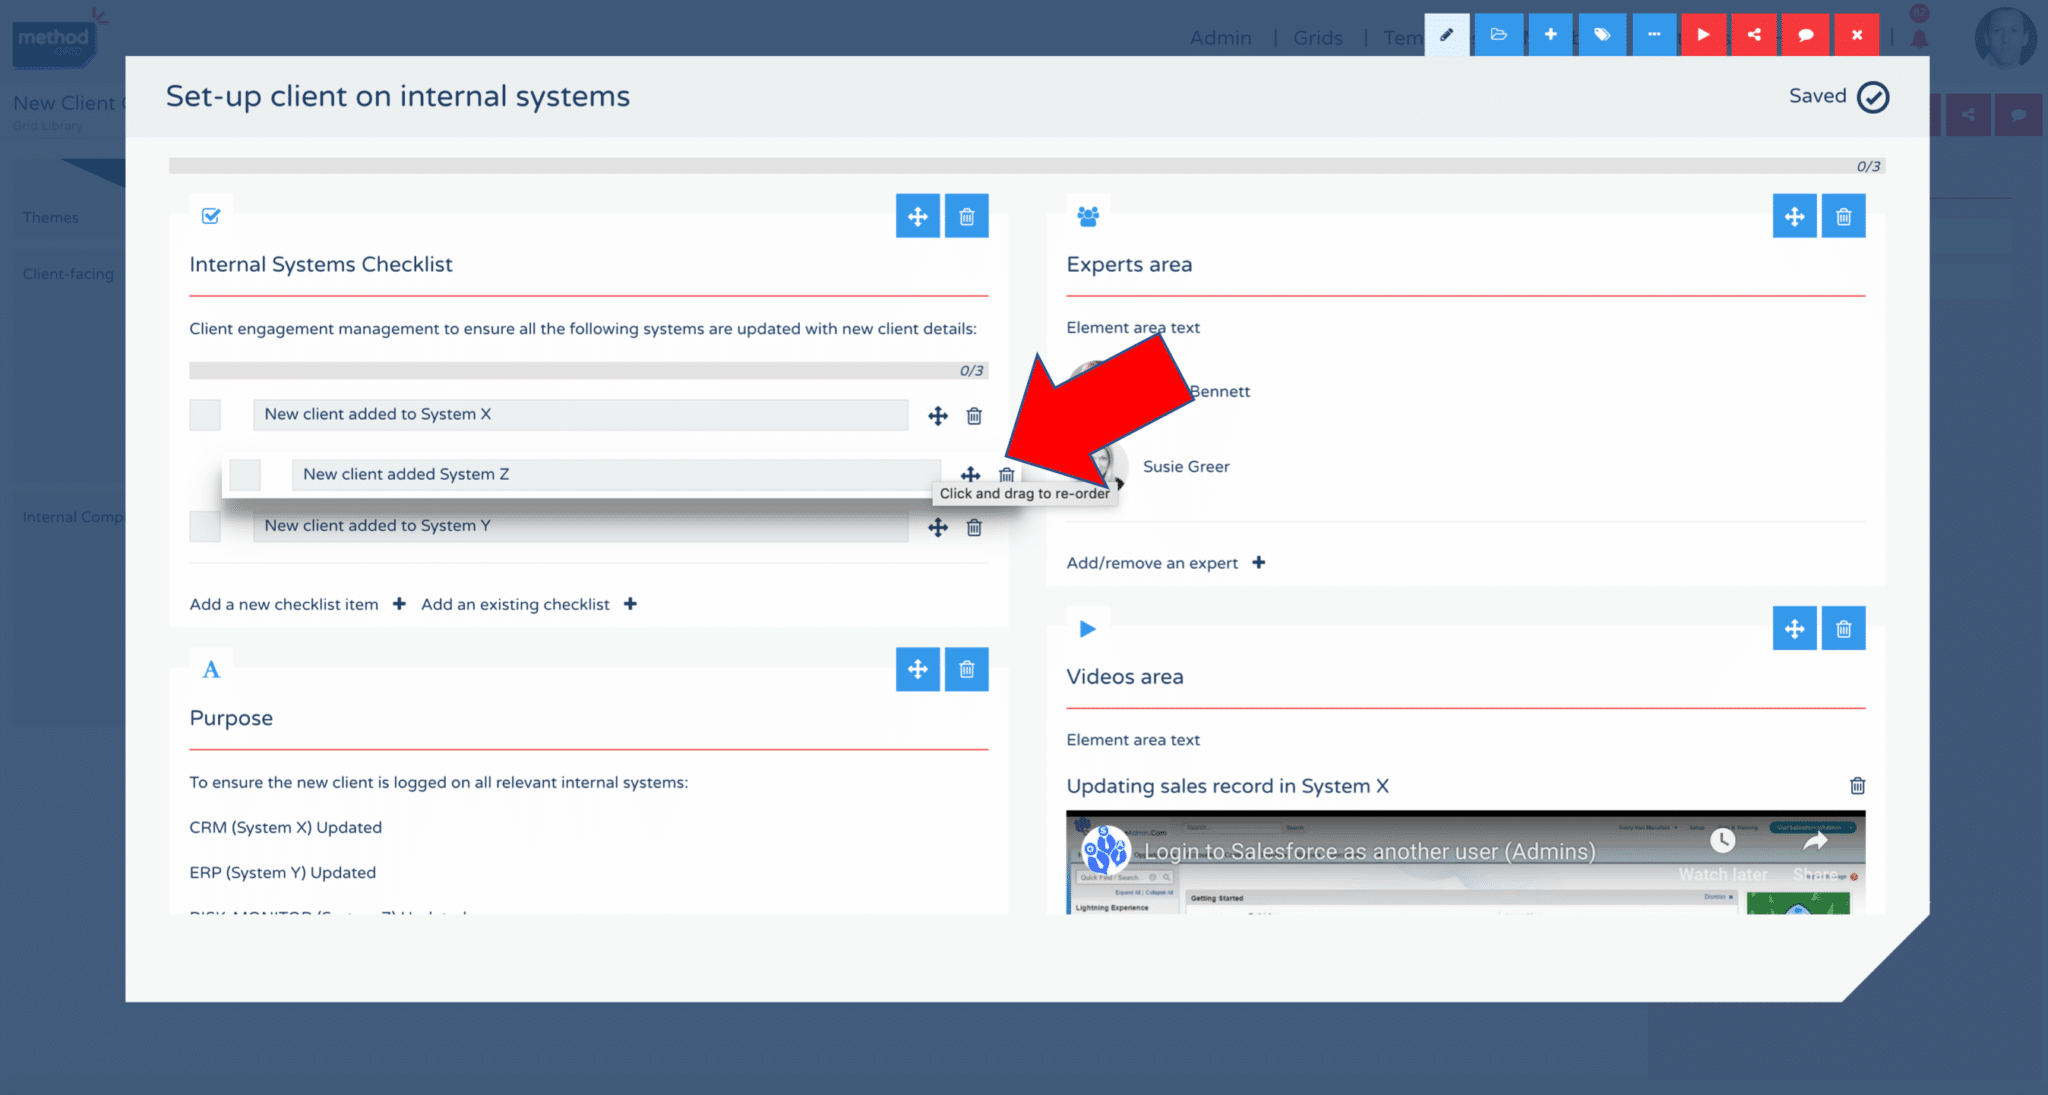
(3) Moving/deleting checklist items
Once checklist items are created, they can be re-arranged and deleted using the action icons to the right of the checklist item. To move a checklist item simply click-hold the drag-drop (“cross hair”) action icon and drag-drop to the desired new placement (within the same checklist content area).
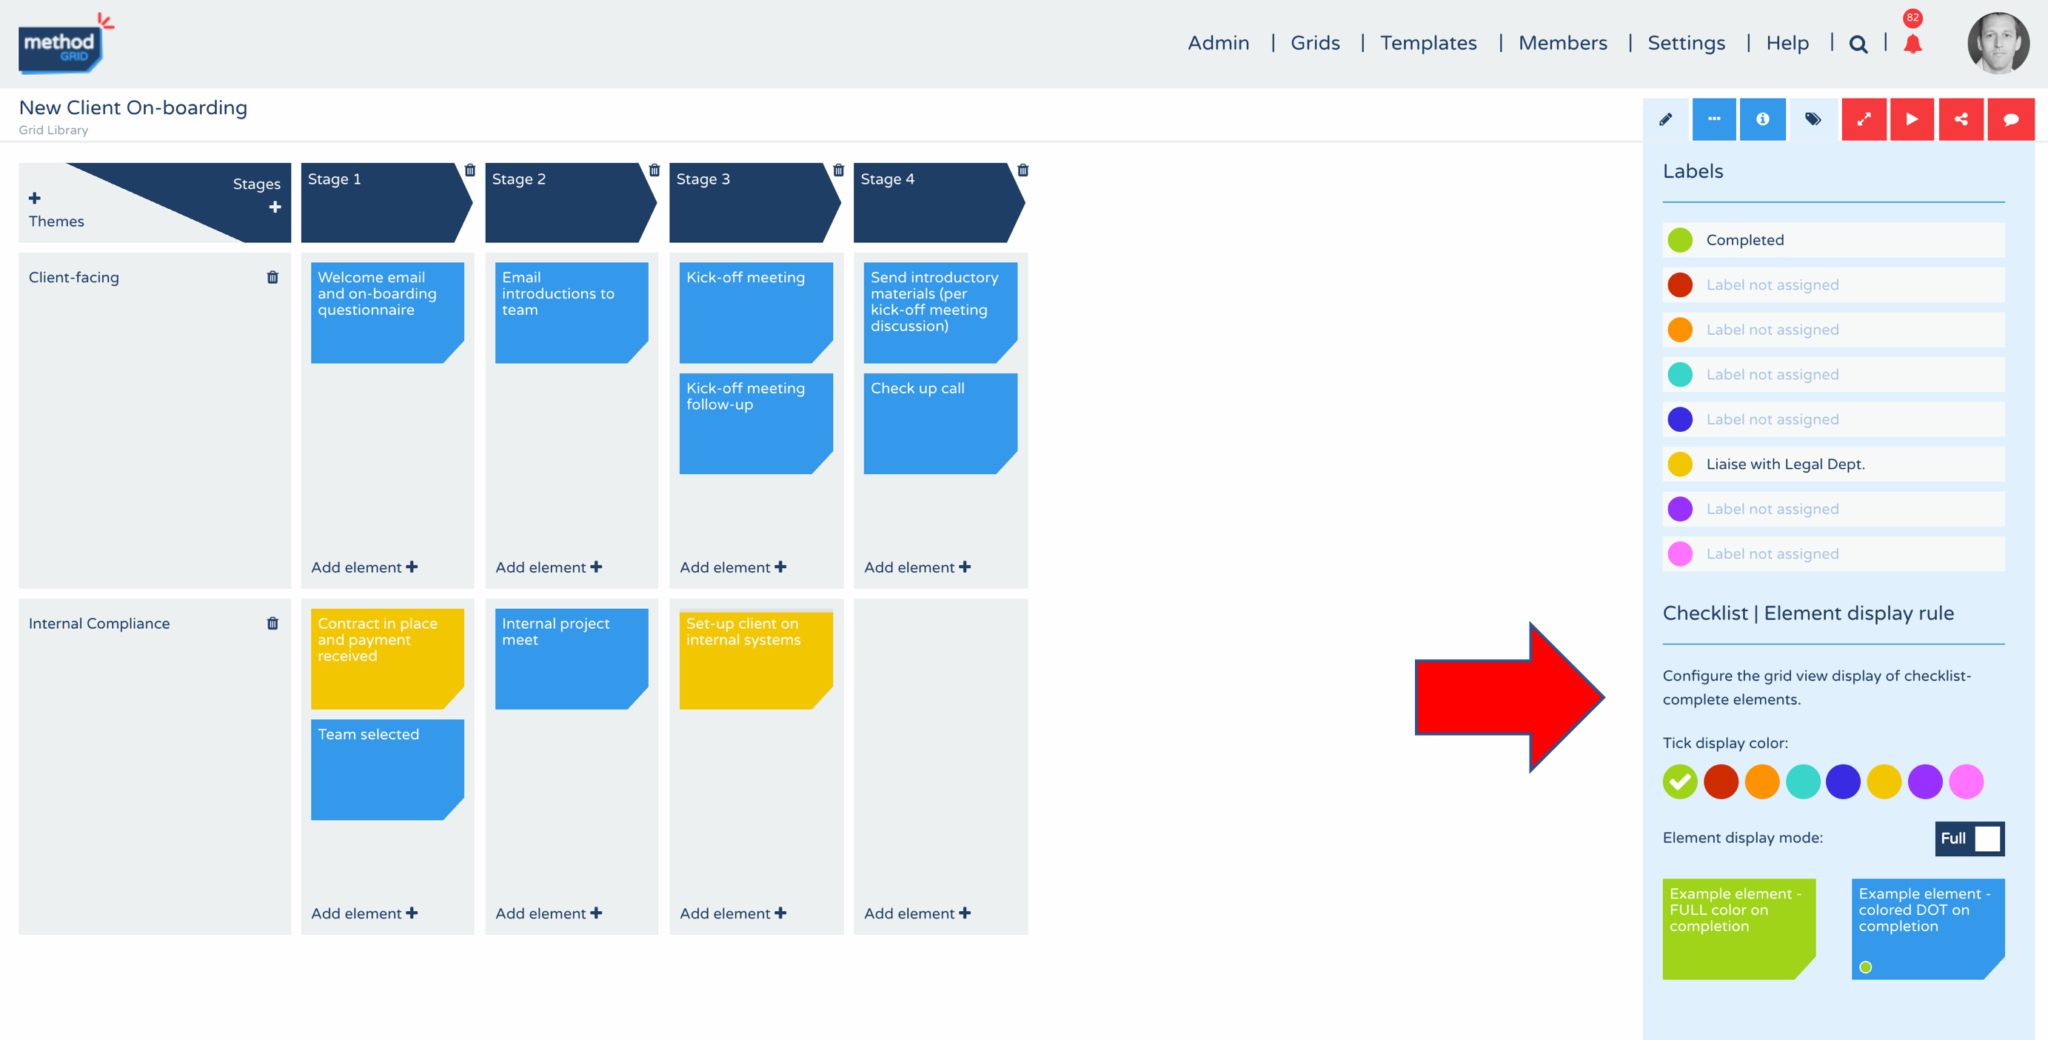
(4) Configuring a checklist-complete element display rule
The real power of checklists comes at the summary grid level.
Within the label dropdown, an architect or builder (in edit mode) can now configure various element display rules to facilitate the easy tracking of workflow progress.
For example, as per the example below, by selecting a checklist-complete display color (green chosen) in FULL mode (the default) – any element within this grid that has all its checklist items completed – will be displayed as a green element thumbnail.
This rule can be turned off (untick the color), changed (click another color) or moved from FULL mode to DOT mode. In FULL mode, a completed element thumbnail displays as the selected color. In DOT mode, a completed element displays the colored dot on the element thumbnail.
(5) Cloning master grids and user completion of checklist items
The real power of this new release comes in the user experience of working through a grid that contains checklists, and, checklist-complete element display rules.
Typically, a master grid (say, your “New client on-boarding” grid) is cloned, and renamed, into an actual instance of delivery (say, “Client on-boarding | John Smith Limited”). See FAQ for more on grid cloning.
Within this new grid, any member of your Method Grid domain can then work their way through all checklist items contained within elements – by simply clicking on the checklist item box (to the left of checklist item) to show as complete (box ticked and checklist item striked-through). Similarly, checklist items can be un-ticked.
(6) Tracking progress – at the element level, the grid level and the summary folder level
At the element level:
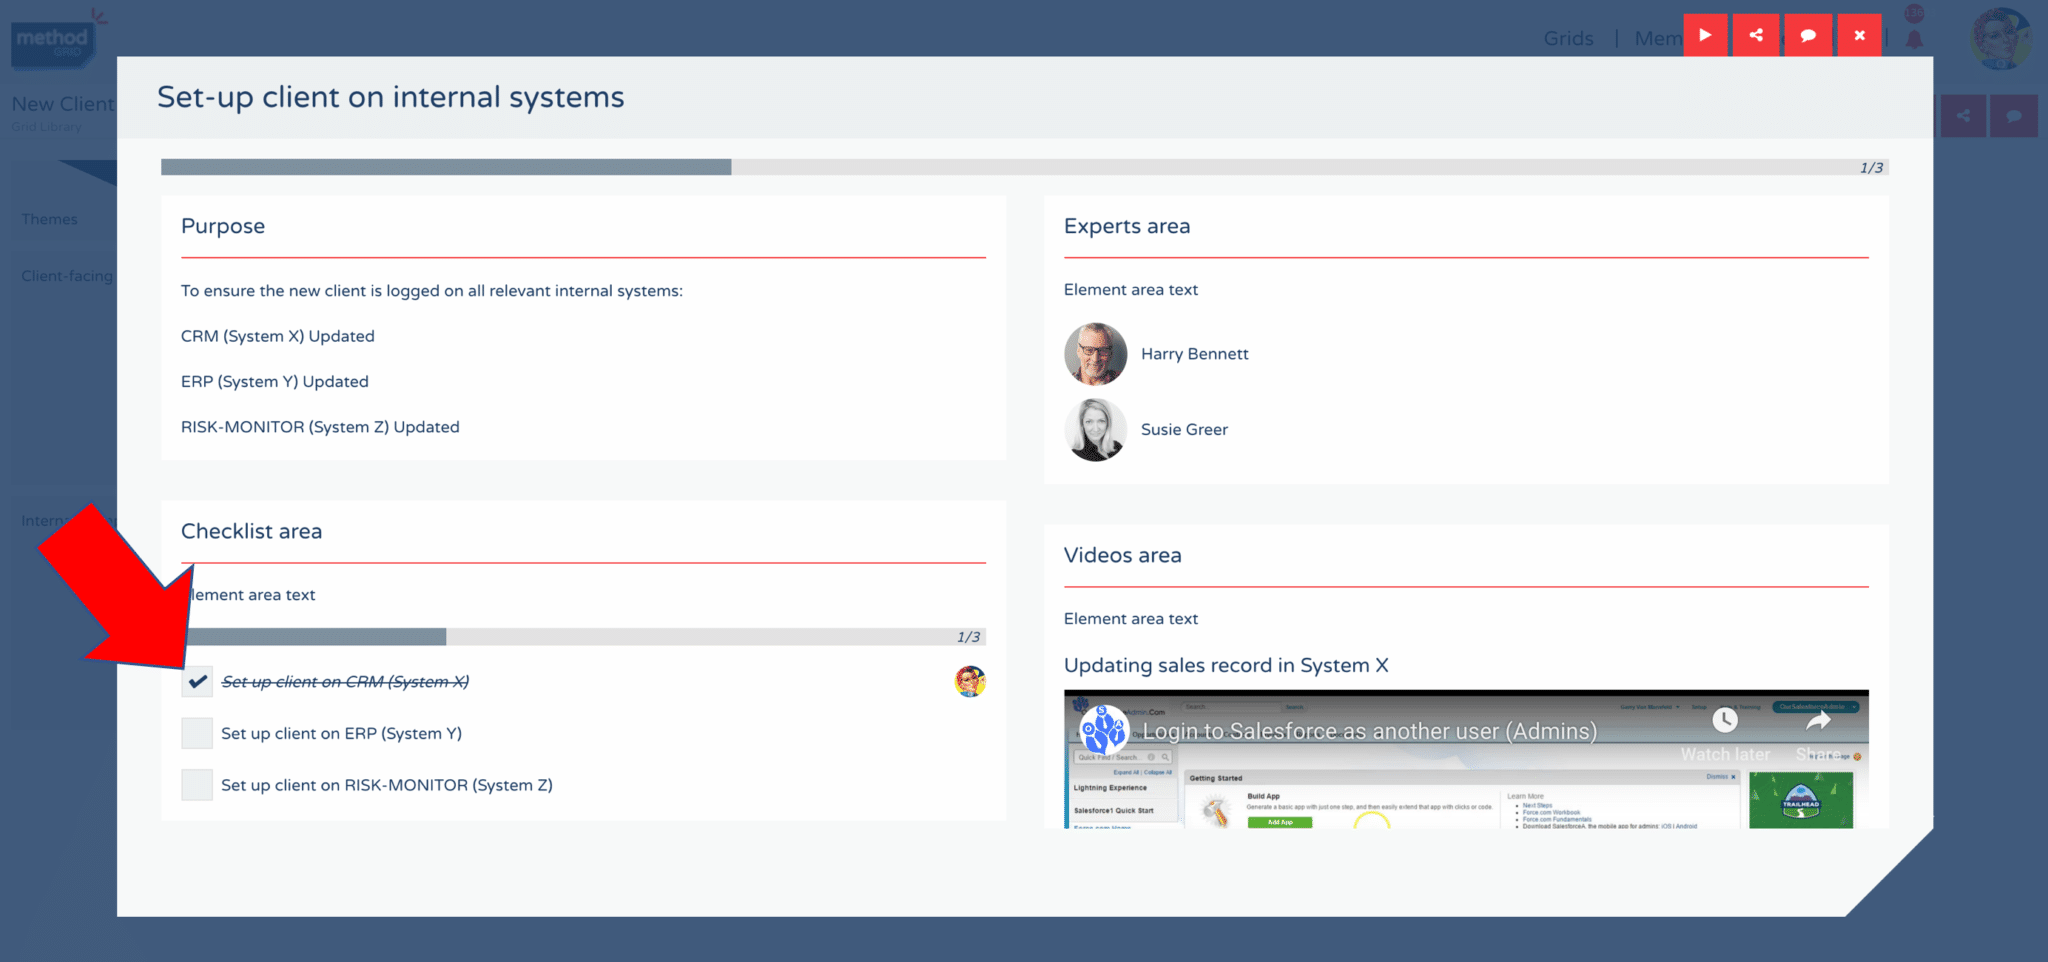
Within an element, there are a number of ways to visually track progress of completed checklist items.
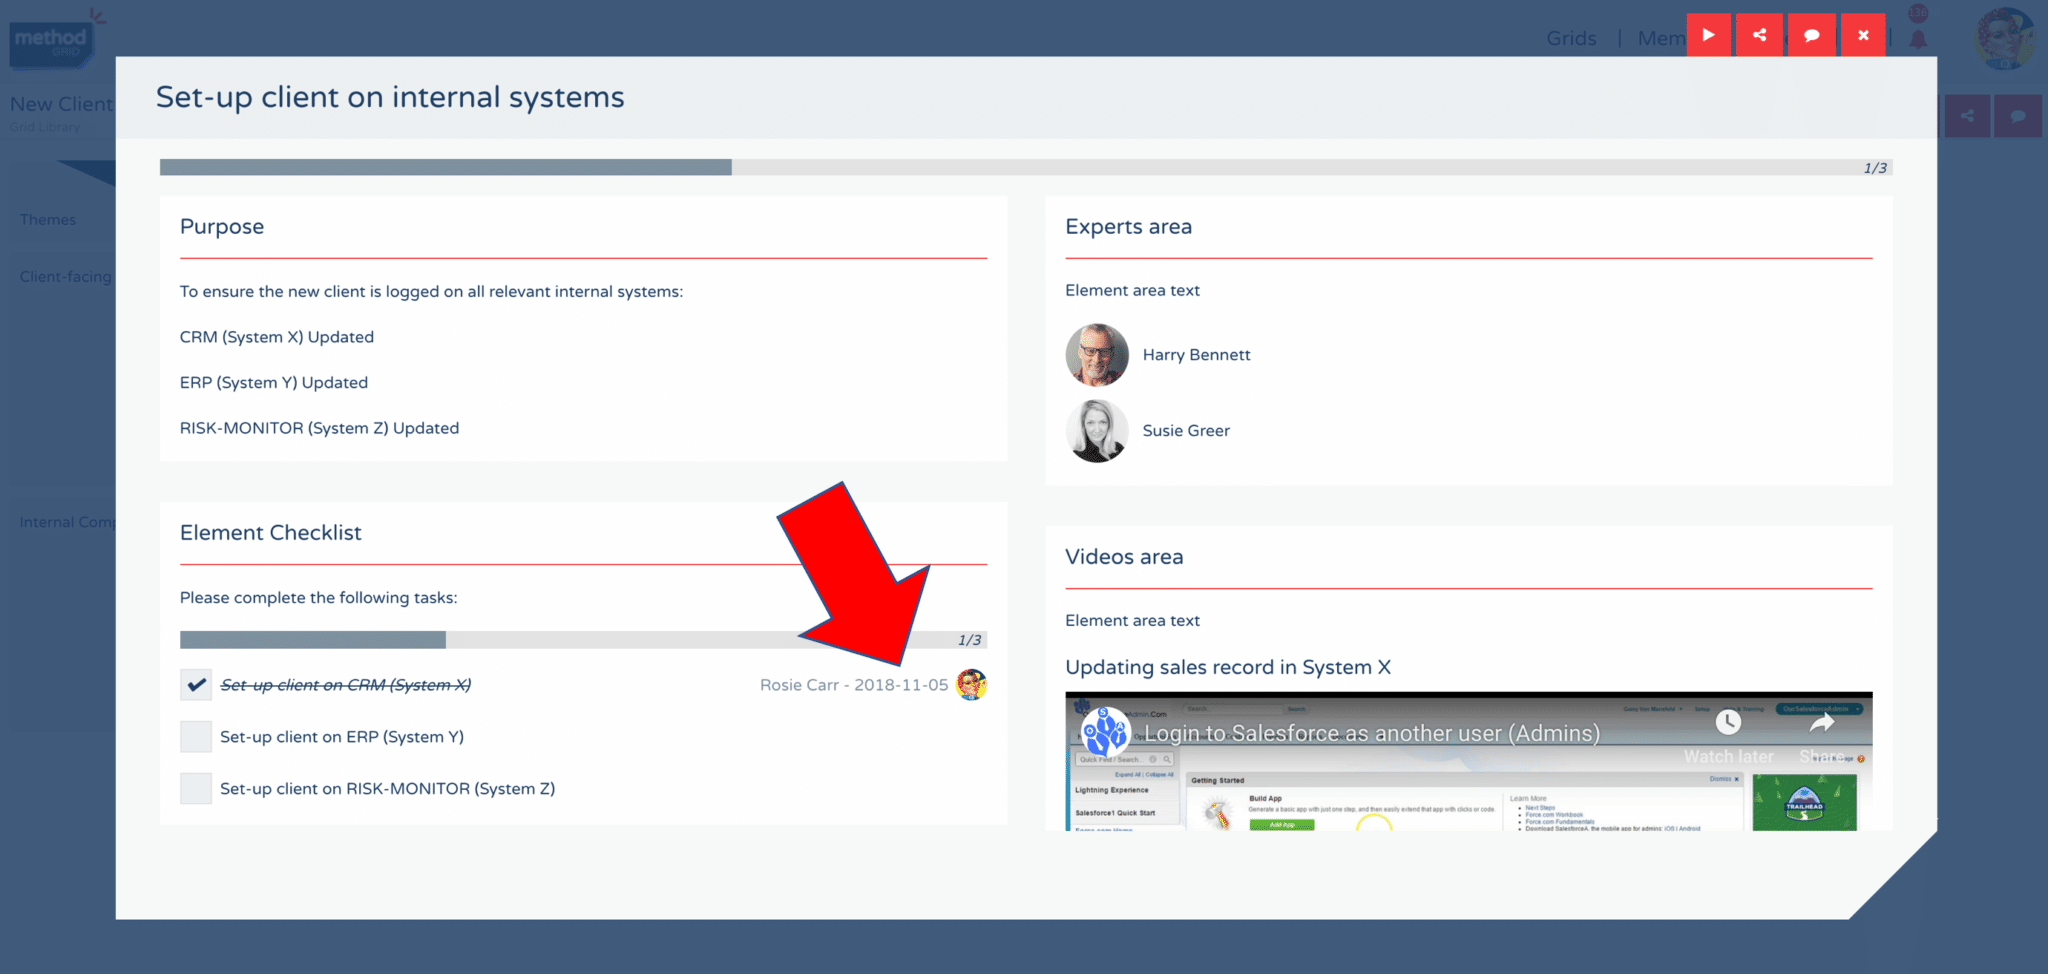
Firstly, at the most basic level, a completed checklist item has a ticked box and the checklist item description is striked-through. To the right of the checklist item, appears the profile image of the user who completed the item – and – if you hover over this profile image a date-time stamp appears (showing when the checklist item was marked as complete).
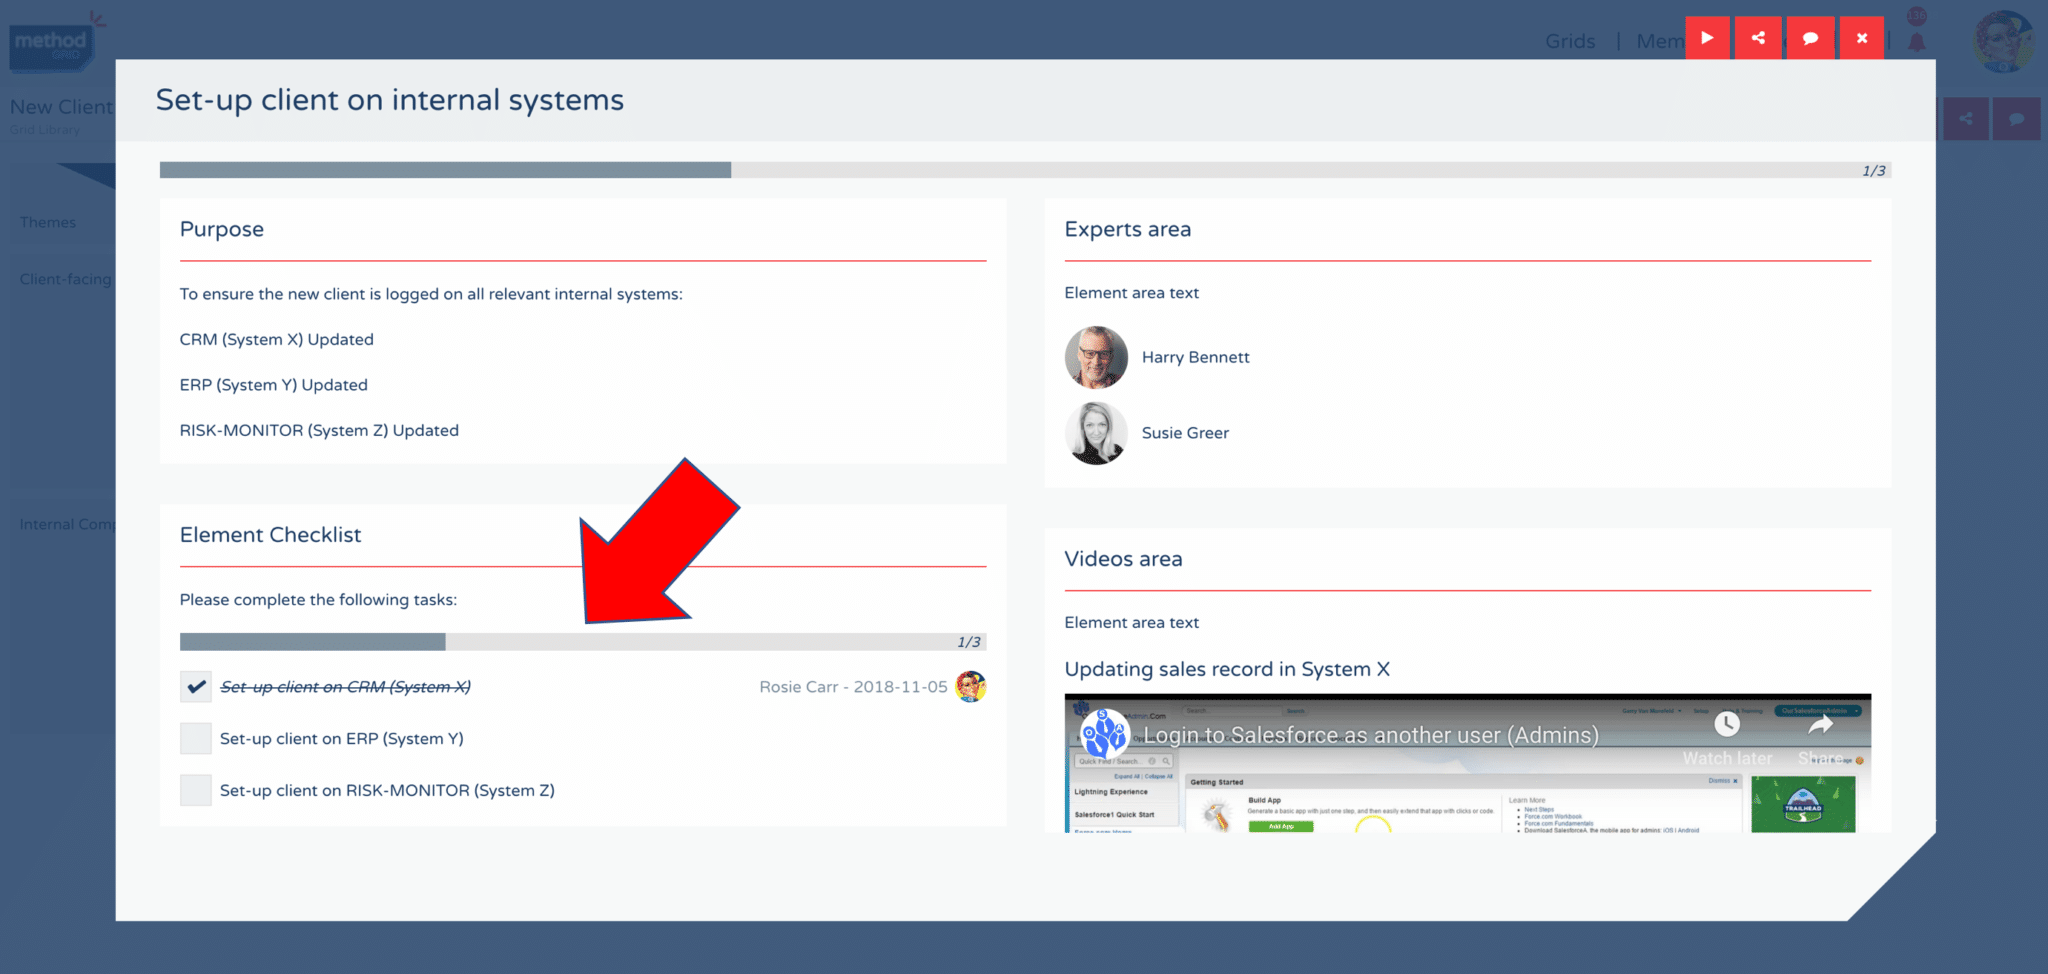
Secondly, progress bars appear at the top of each separate checklist area within an element.
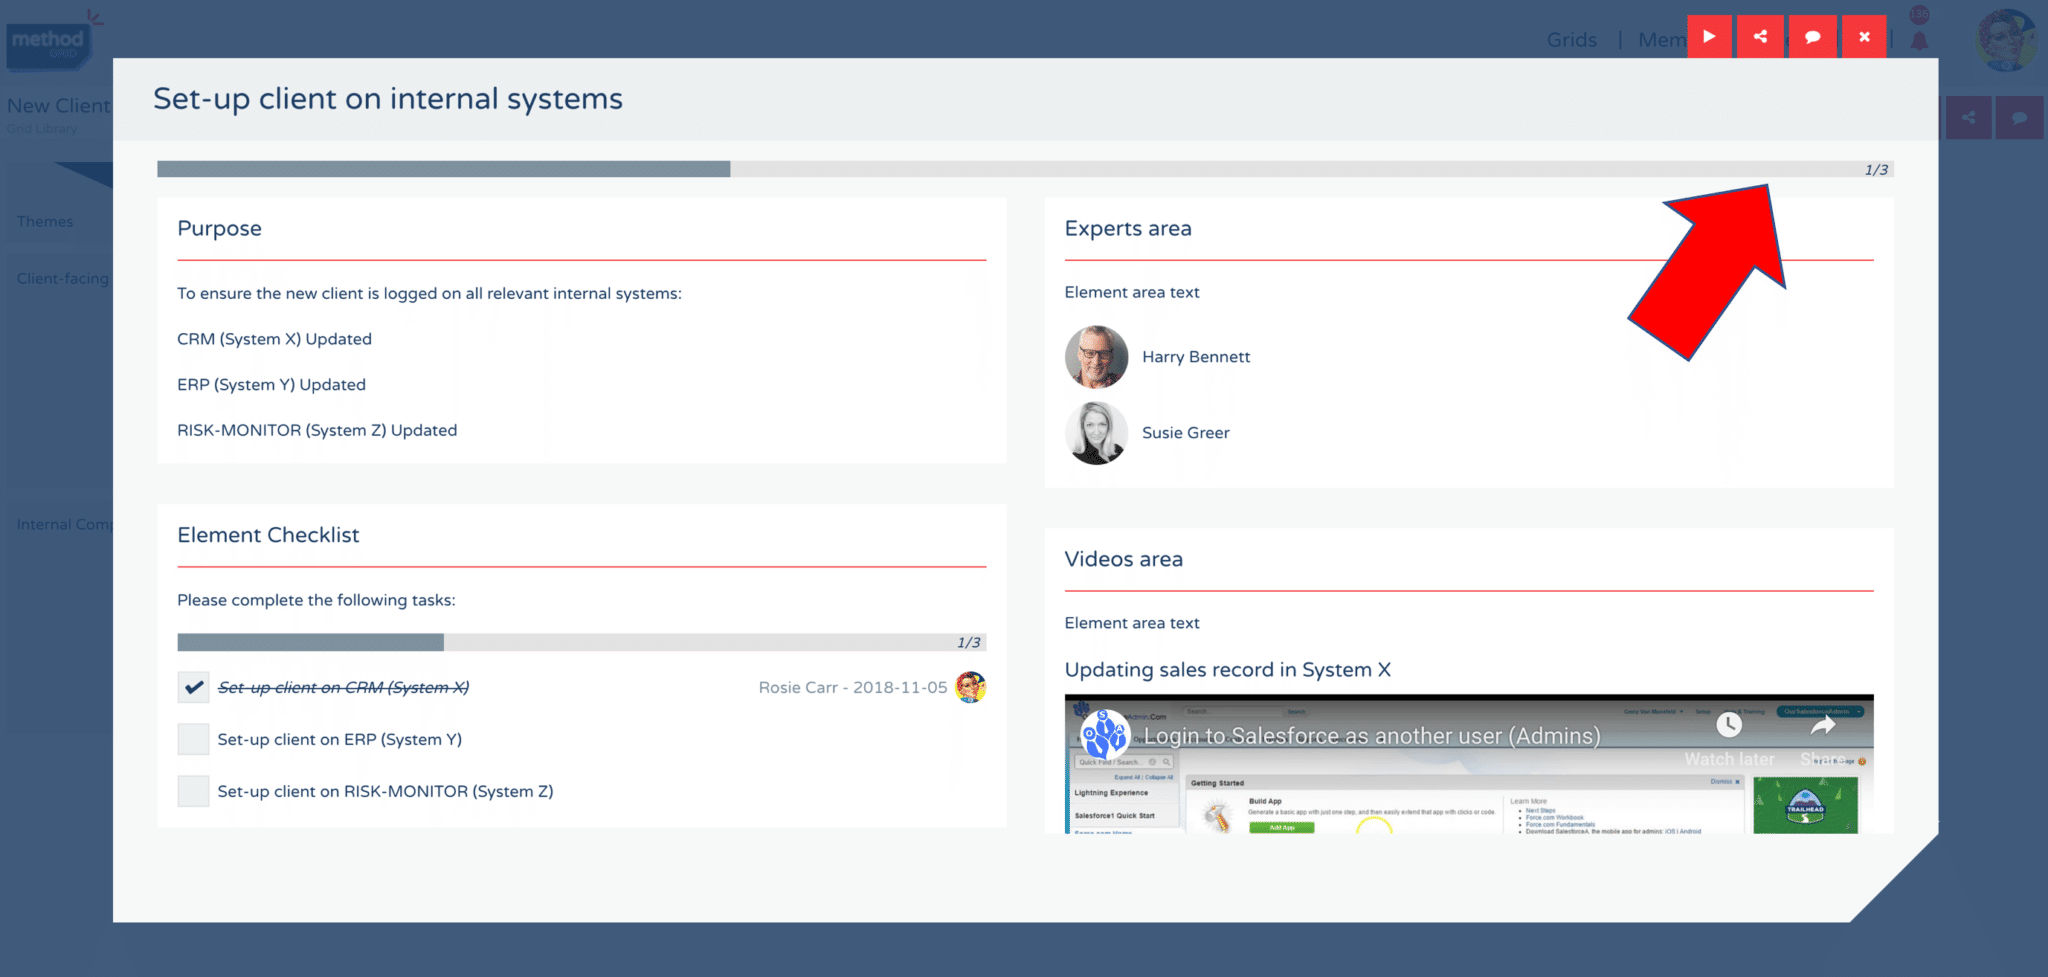
Thirdly, a summary progress bar appears at the top of an element – that aggregates checklist items together if there are multiple checklist areas (else the same as a single checklist area’s progress bar).
At the grid level:
Now, with this new release, you can also see progress at the grid level in a number of ways.
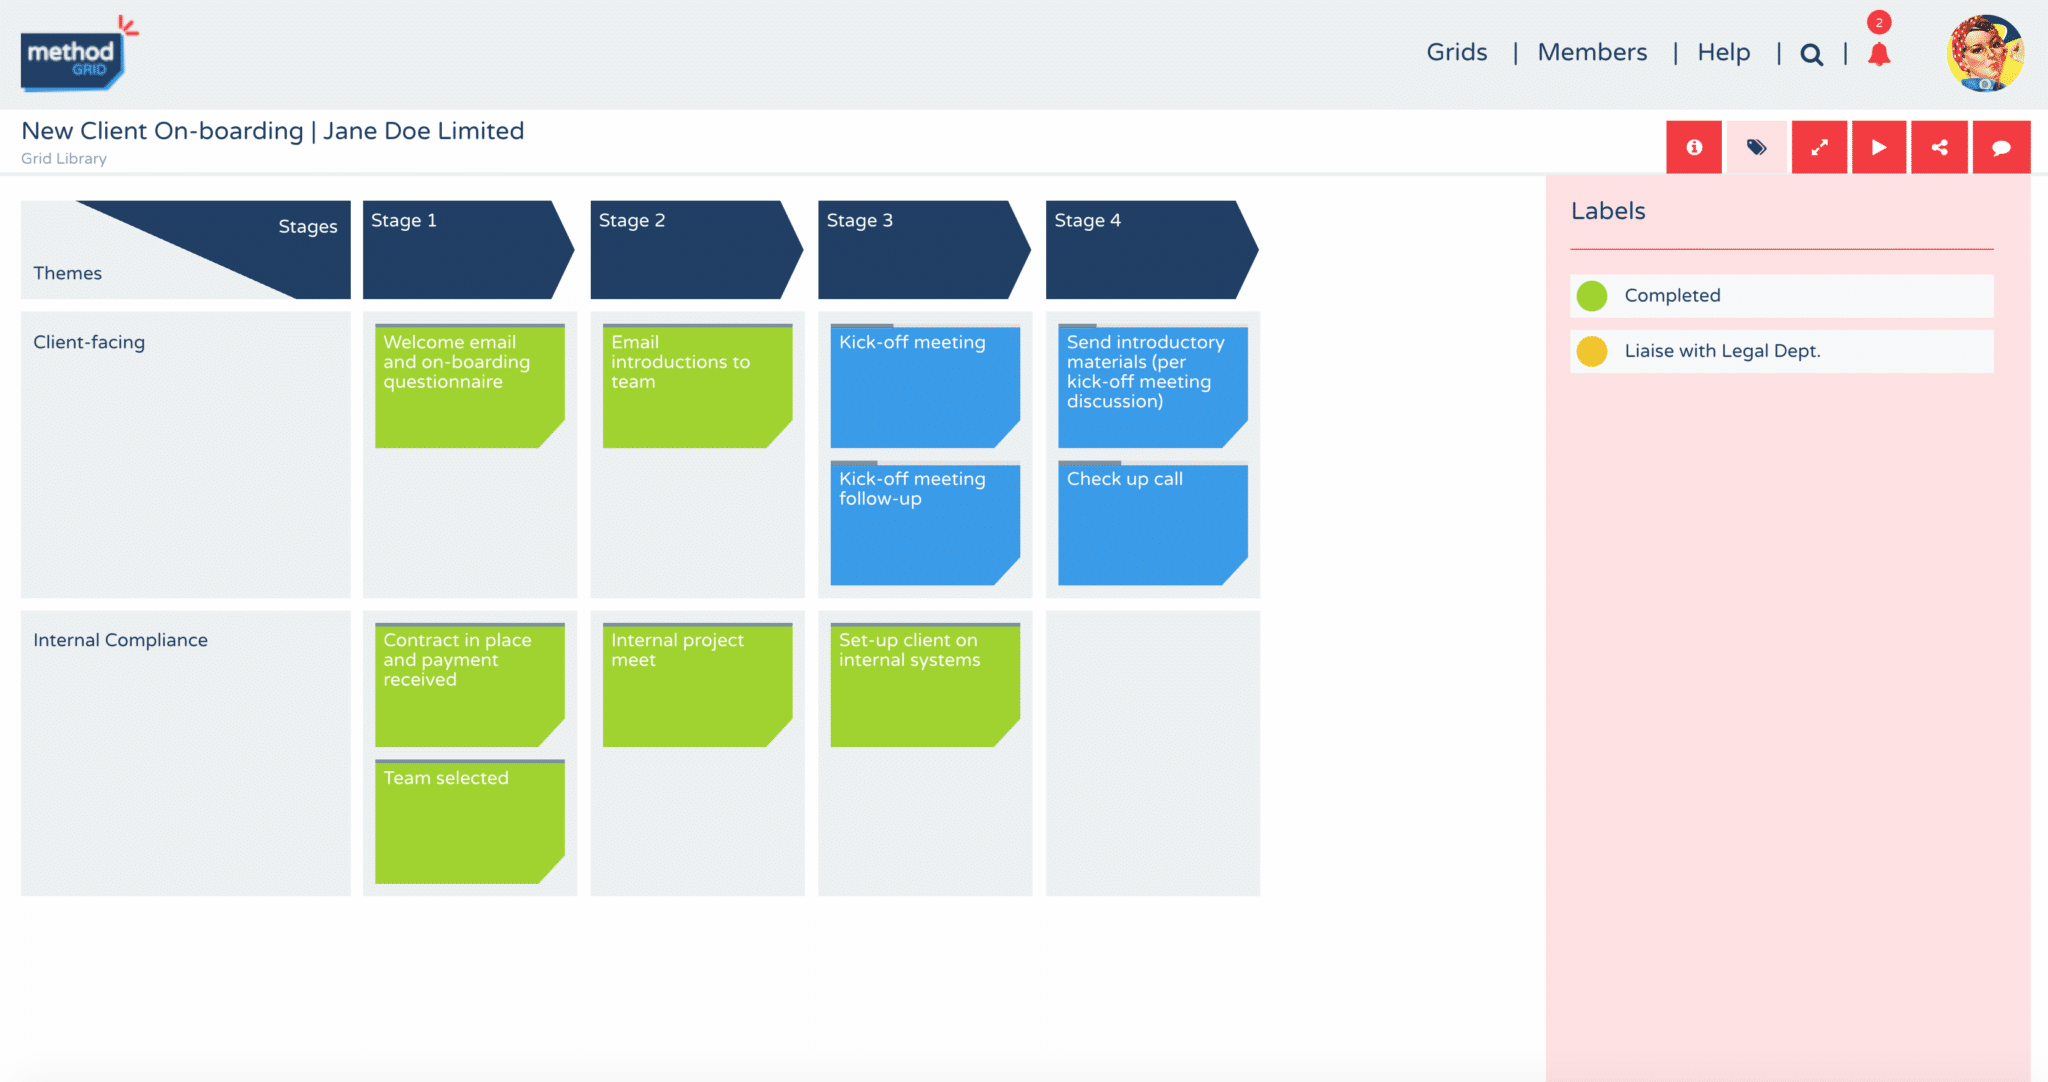
Firstly, with a checklist-complete rule in place, there is immediate visual indication as to a user’s progress through a grid.
For example, if the checklist-complete rule is set as per above, then all completed elements will display green – as per the following screenshot.
As a top tip, updating your grid’s label legend to reflect this rule will remind users of this logic.
Secondly, elements that contain checklist items will have visual progress bars at the top of the element thumbnail – with the dark grey line indicating progress.
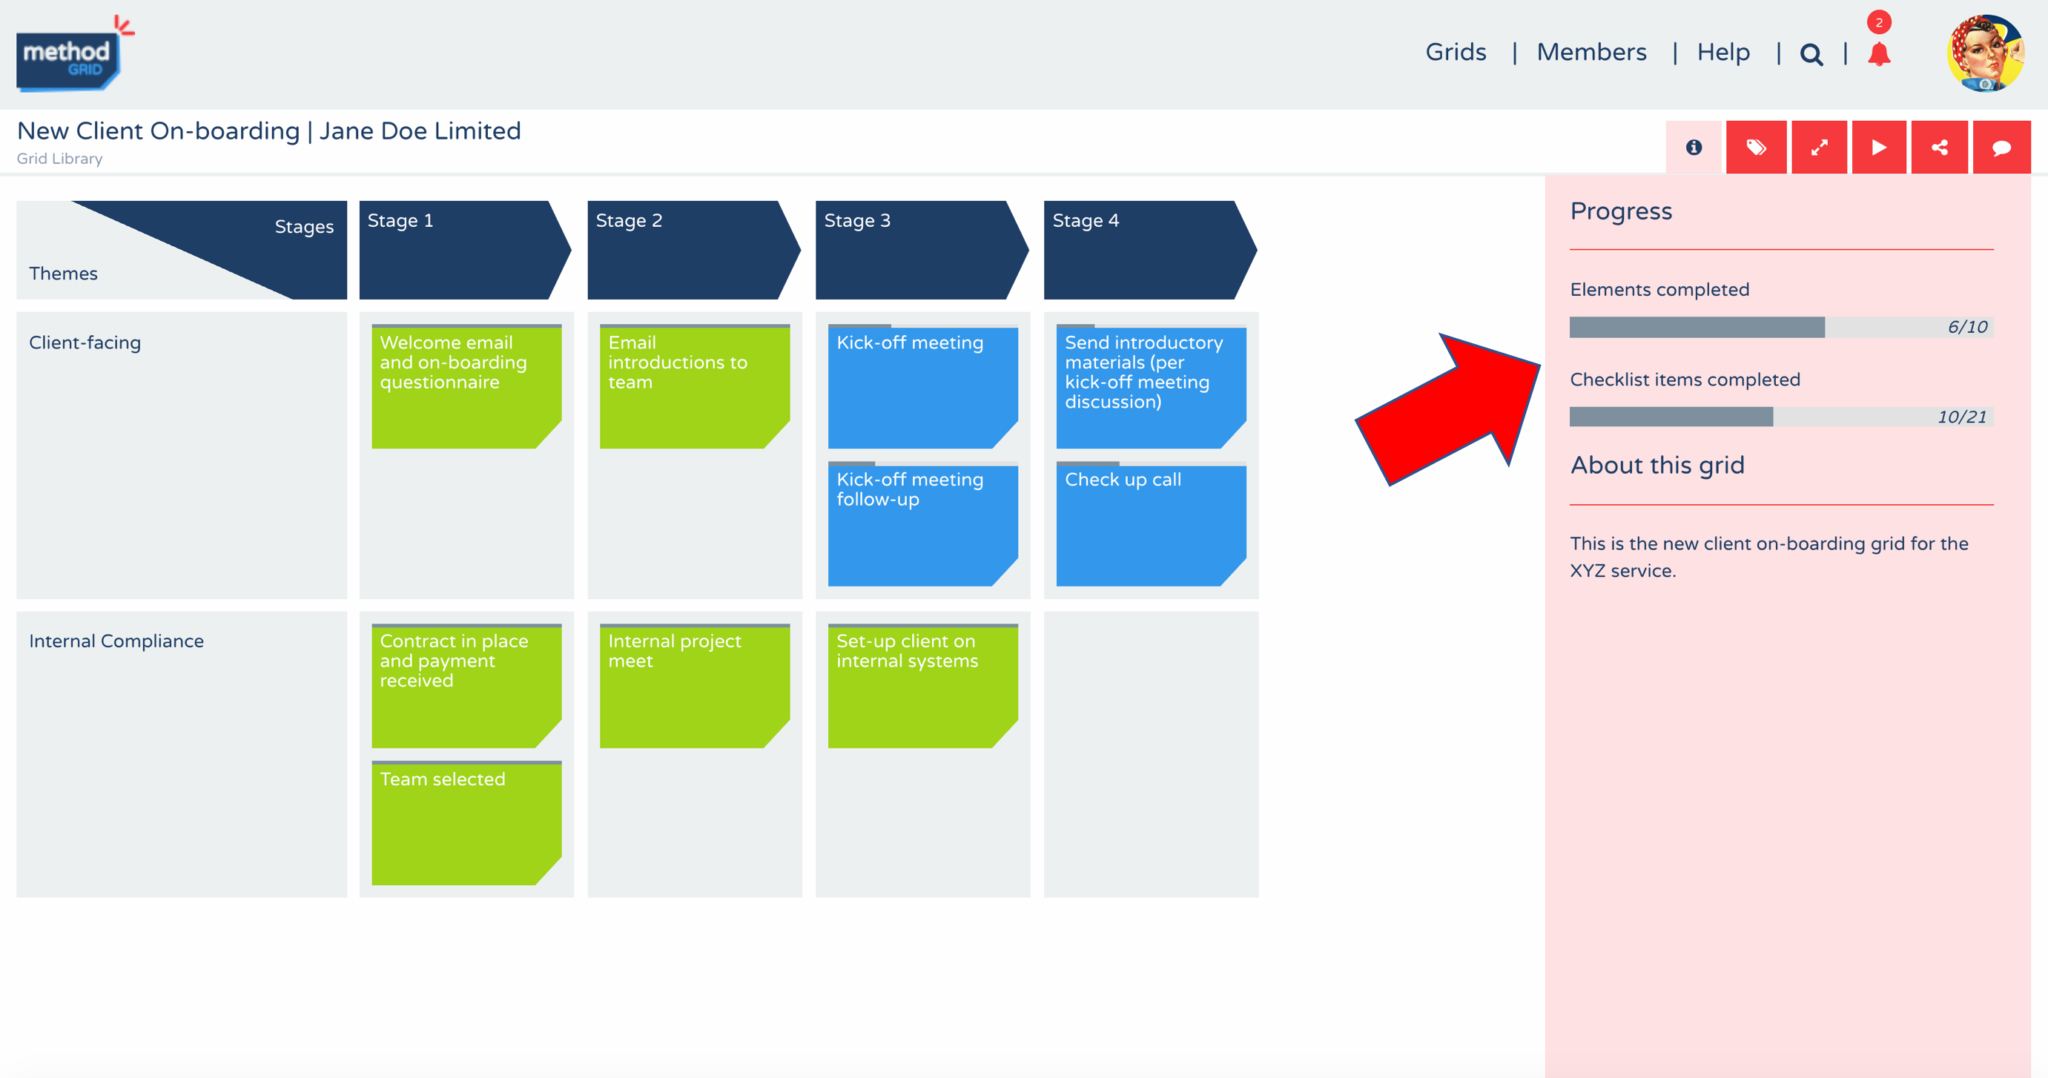
Thirdly, when a grid contains checklist items, if you open the info panel (red “info” action button), you will see a progress summary by way of (a) Elements (with checklists) completed [completed/total number] and (b) Total checklist items completed [checklist items completed/total number].
Summary folder level:
Finally, within your grid library view (and a certain grid folder), there are now a couple of ways you can quickly see grid progress completion:
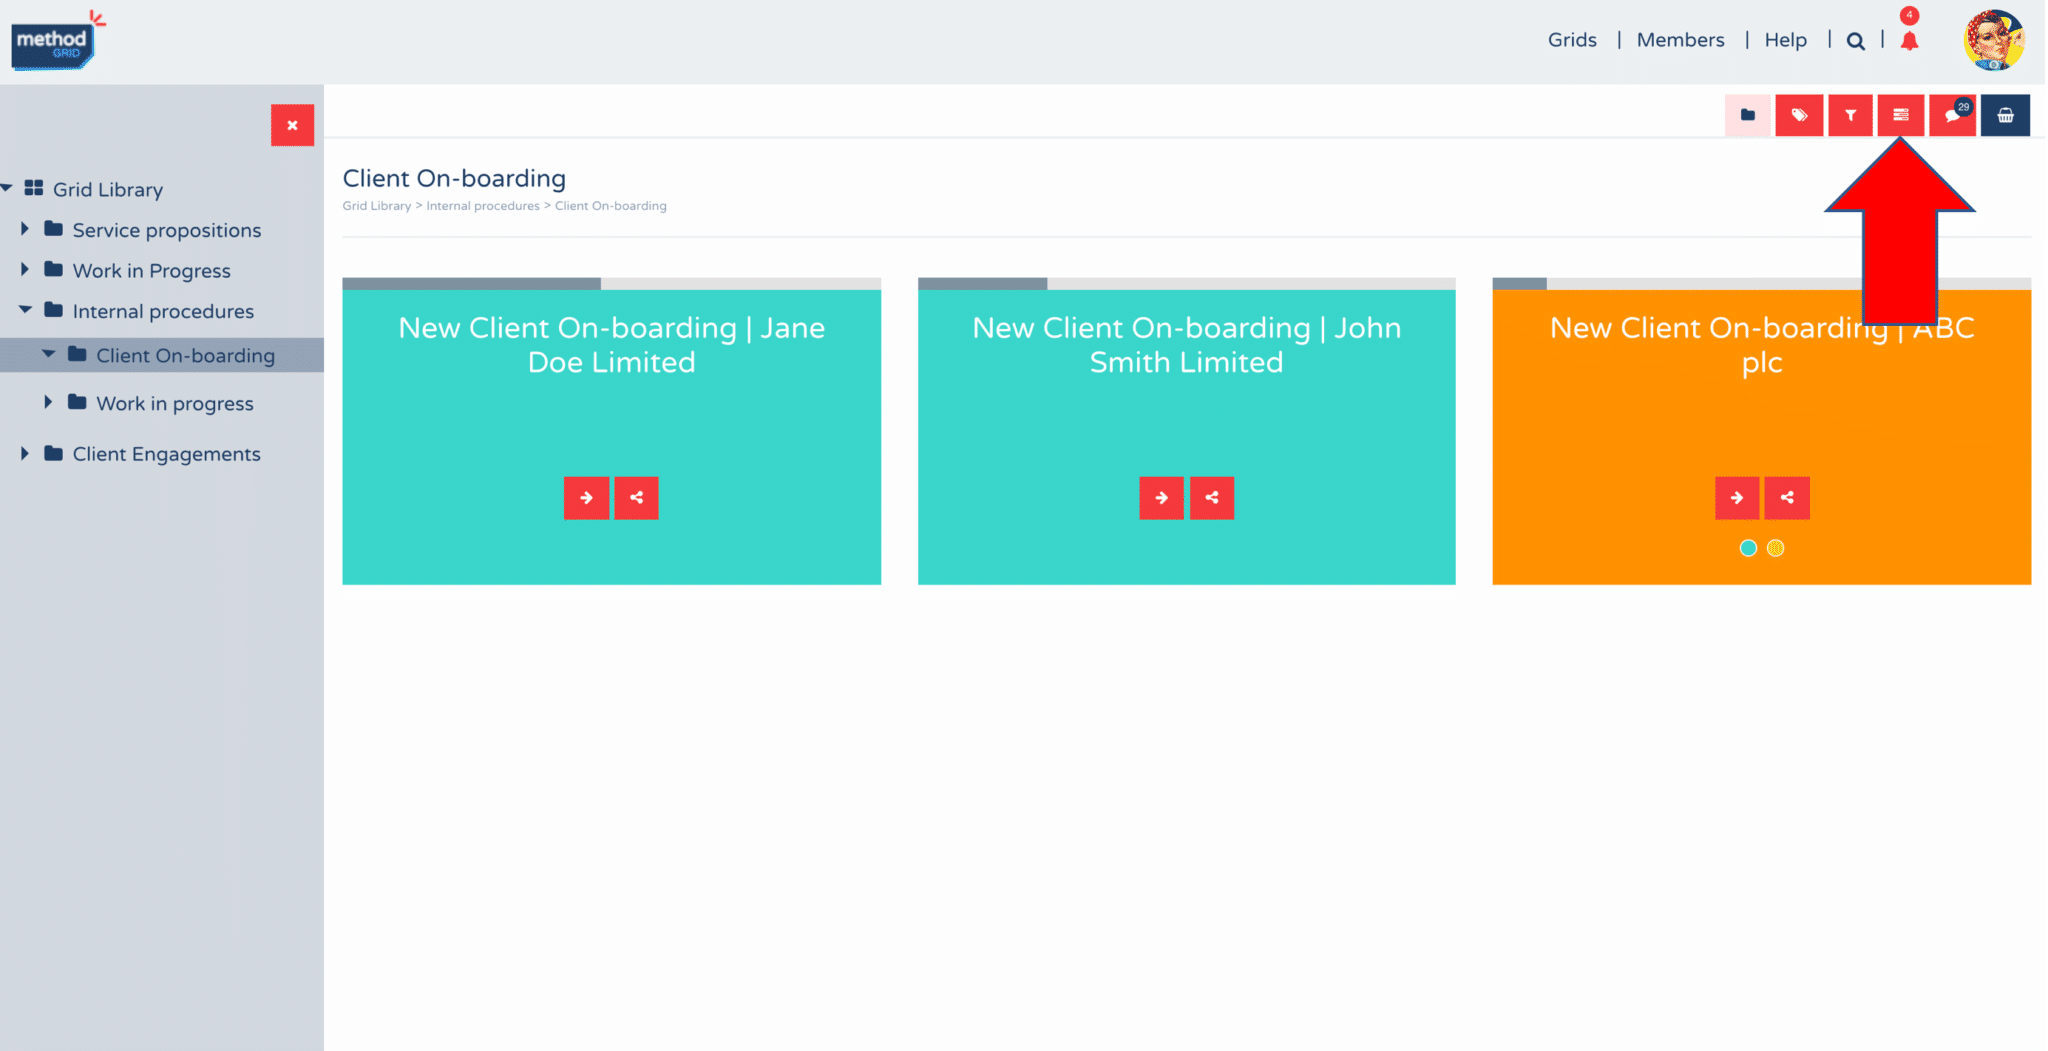
Firstly, within this view (by default) each grid thumbnail now shows the aggregate completion status of a grid containing checklists – via a progress bar at the top of the grid thumbnail. The dark grey progress bar indicates the % completion of checklist items in the grid (completed/total). The actual numbers and % complete can be viewed by rolling over this bar.
An architect/builder can turn off progress bars, on a per-grid basis, from within the info dropdown of the grid (switch is visible in edit mode). By default, progress bars will appear at the summary folder level unless turned off in this way.
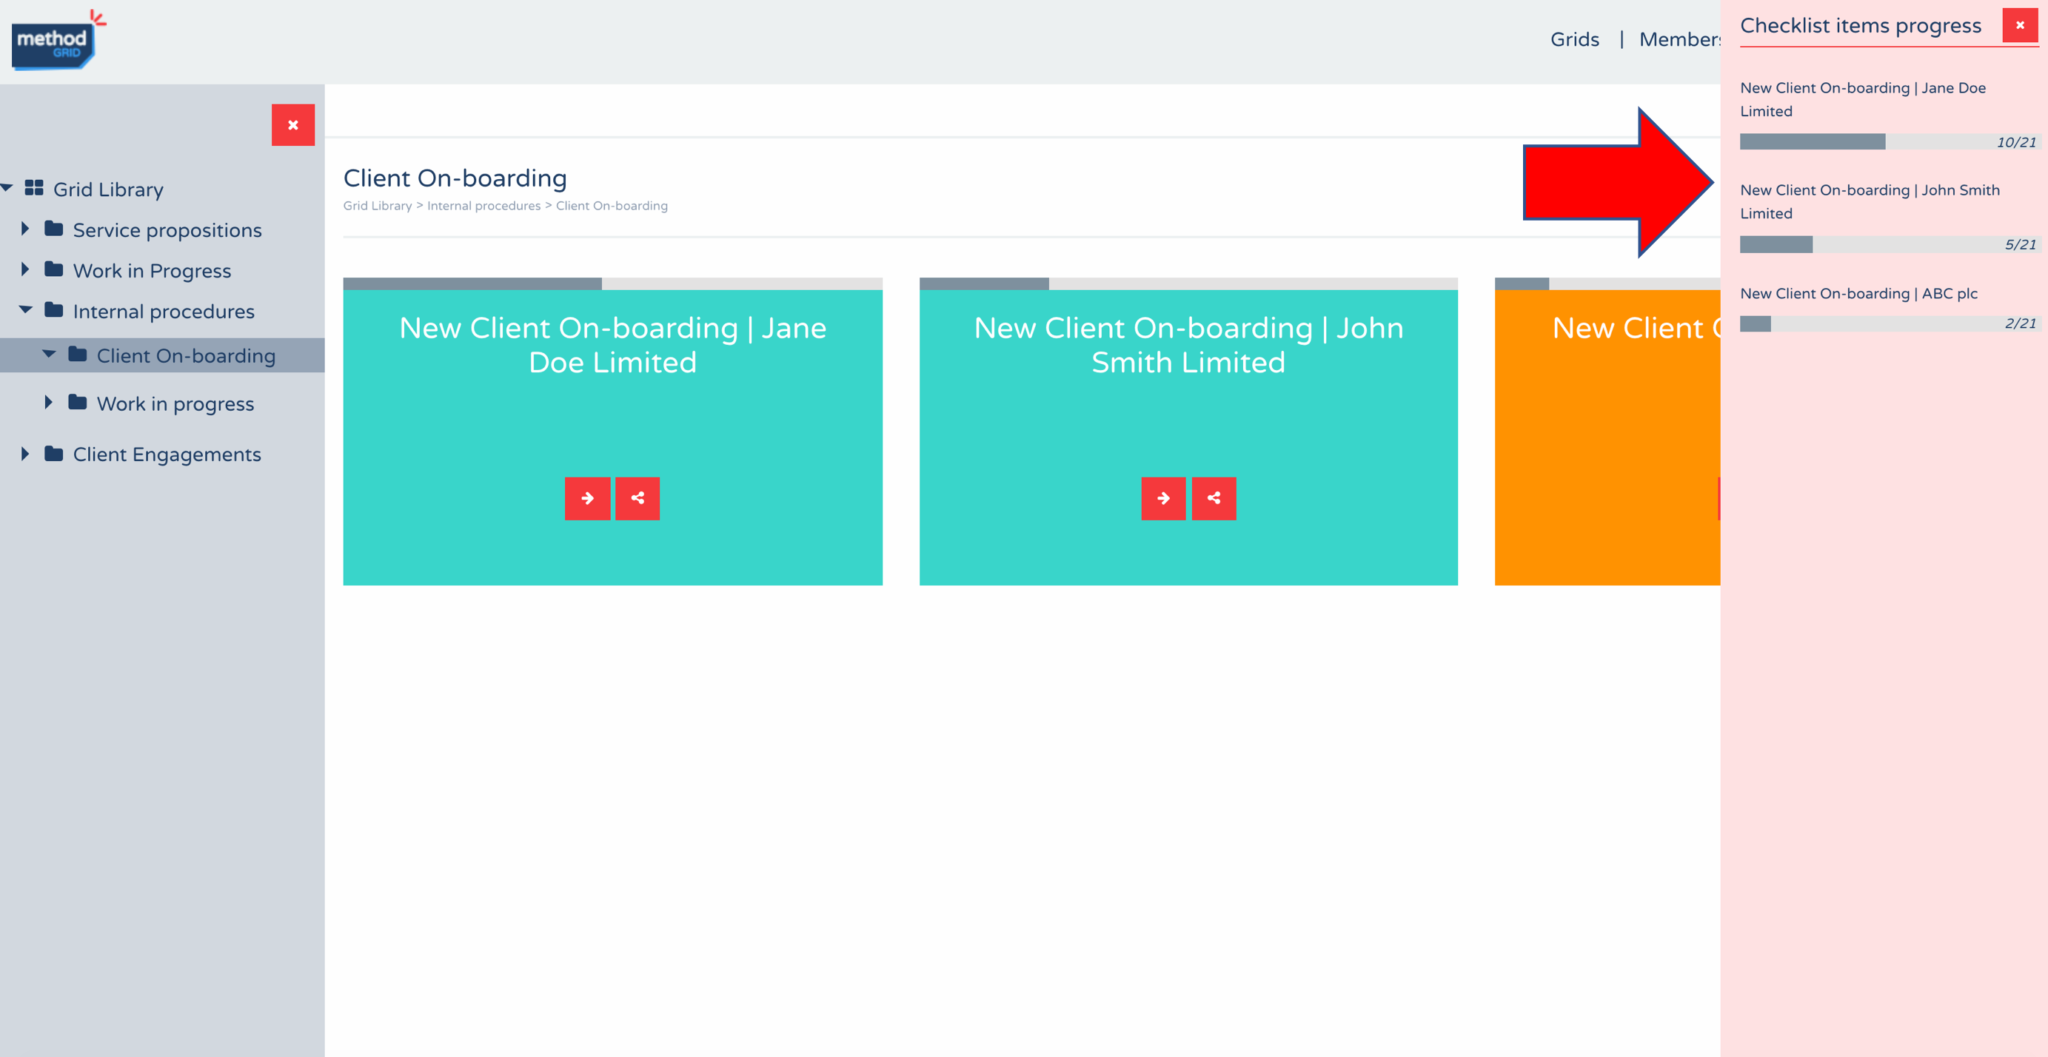
Finally, we have added a new action button to this view’s action button bar – a “progress overview” dropdown. Selecting this dropdown lists all grids within your folder – that contain checklist items – along with the their respective progress bars showing the number of completed (/total number) of checklist items in the grid.
This, effectively, serves as a simple – but powerful – summary progress overview report.
In summary, this has been a major release for us here at Method Grid HQ and we hope it has taken the value of the solution up another notch for our community of users.
As always, whilst this has been subject to major testing, we would really value – commensurate with the scale of this new release – all feedback (especially so if you discover any yet undiscovered glitches).
Thanks again to everyone who helped invoke and shape this exciting new set of features!
 Project and Program Management
  Project Governance Framework
  Benefits Management Framework